Update Project Roles
In this topic, we'll show you how to update Project Roles.
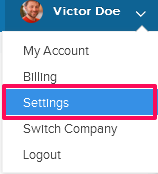
- Click on the profile image located on the top right corner of the Builderbox screen.

- Click on Settings.
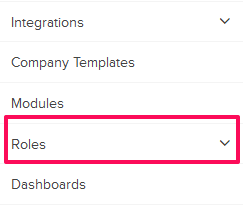
- Click on the Roles from the left navigation.
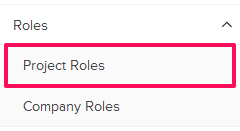
- Click on Project Roles listed under the Roles menu.
- Click on the Select Role Type field.
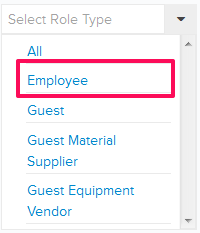
Note: There are four Project Role types- Employee, Guest, Guest Material Supplier and Guest Equipment Vendor. Employee role type is for all the members of the Super Admin’s company (or Super Company). Guest role types are for External Companies’ team members and they vary based on the External Company type (Guest/Guest Material Supplier/Guest Equipment Vendor).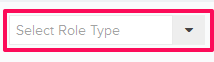
- Let’s use the Project Role type Employee for the purpose of this tutorial. Select the Employee role type from the list.
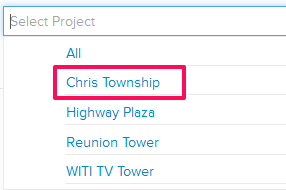
- Click on the project drop down.

- Select the project from the project drop down.
- Click on the View Roles button.

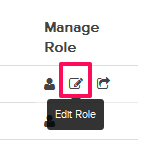
- Click on the Edit icon.
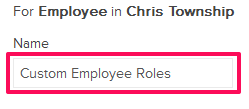
- Update the name and description for the role.

- Click on Team Members.
Note: We are using Team Member module as an example here. You can replicate the same process for any other modules on the list.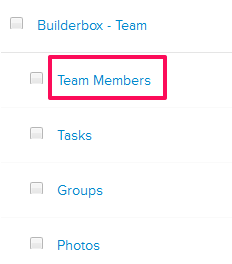
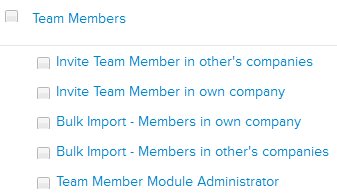
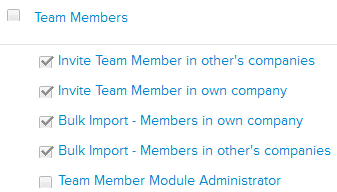
- Select the check boxes next to the permissions/resources that you want to assign to the members with this role.
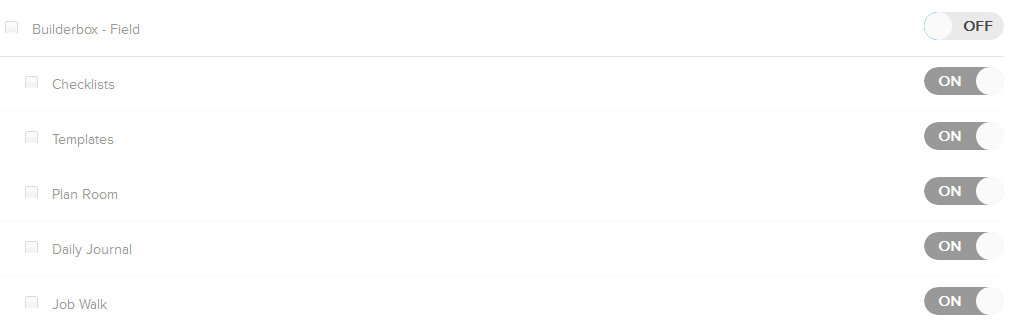
- Click on the ON/OFF switch next to Builderbox – Field.
Note: You can turn on or off all the Field module/or individual modules for a role by using this feature.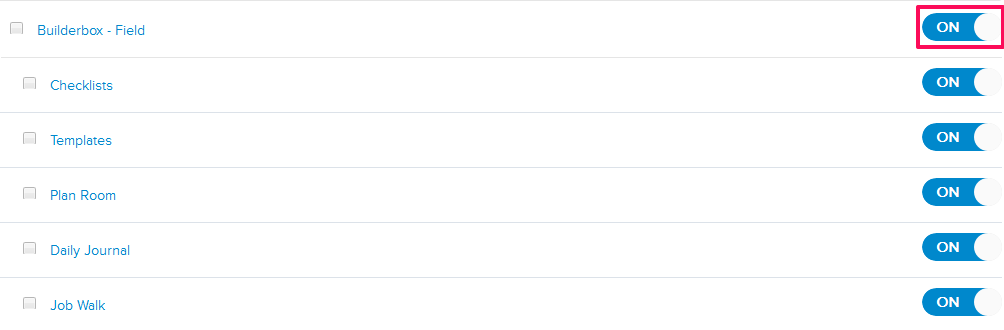
- All the modules within Builderbox Field will be turned off.
- Click on the Save button located on the top-right corner of the screen.

- Click on the OK button when prompted.
